TL;DR — For the Immich upload ~100 MB limit, we still have the manual option:
📁 Direct Upload from PCS: To upload files directly from your host (useful for initial import of existing photo libraries or large file imports):
- Generate an API key in Immich (Account Settings → API Keys) — Immich is multi-user, so you can create API keys for different users if needed
- Login: docker exec immich immich login-key http://localhost YOUR_API_KEY
- Place files in /DATA/Gallery/ and run: docker exec immich immich upload --recursive /import
😕 What's the Problem?
When you try to upload large files (typically over ~100 MB) through Immich — either via the web or the mobile app — the upload silently fails. You'll see an error like "upload error for x assets" or "Unable to upload file".


ℹ️ This is an Immich-specific limitation, not a PCS issue. Uploading files through other PCS apps works perfectly fine. A permanent fix is in progress — if you're a developer, check out our bounties in the Creator Program for details.
🔍 When Does It Happen?
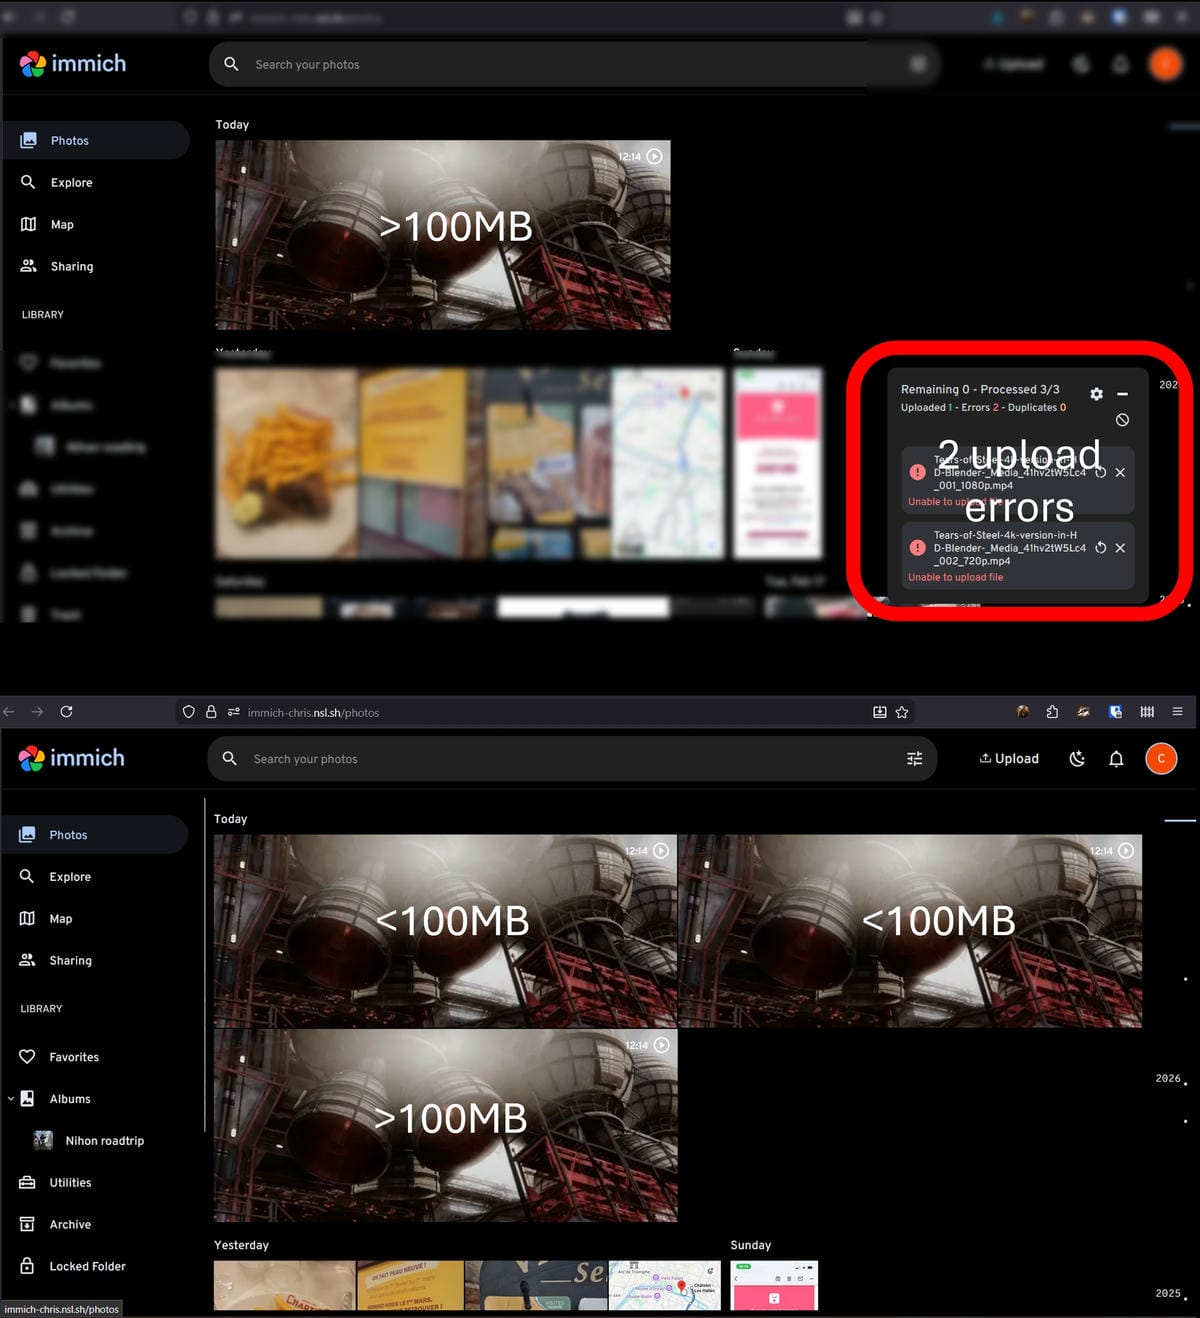
Here's a real example — the same video in three different resolutions:
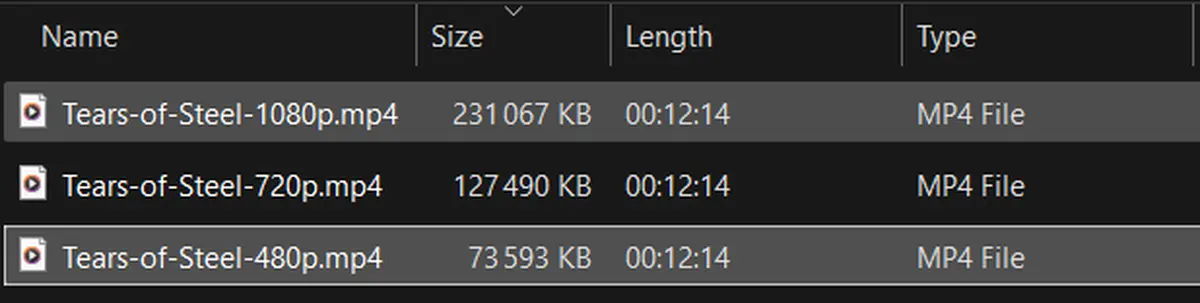
| File | Size | Upload via Immich |
|---|---|---|
| Tears-of-Steel-1080p.mp4 | 231 MB | ❌ Failed |
| Tears-of-Steel-720p.mp4 | 127 MB | ❌ Failed |
| Tears-of-Steel-480p.mp4 | 73 MB | ✅ Success |
Only the file under 100 MB uploaded successfully. The other two need the workaround below.
🛠️ The Fix (3 Easy Steps)
Step 1 — Upload files to your PCS manually
Since Immich can't handle the upload directly, we'll place the files on the PCS first, then tell Immich to import them.
Choose your method:
- Small/medium batches (under 2Go) → Use the Files app (installed by default on every PCS)
- Large batches (over 2Go) → Use Samba (see here our Samba documentation for setup)
Using the Files app:
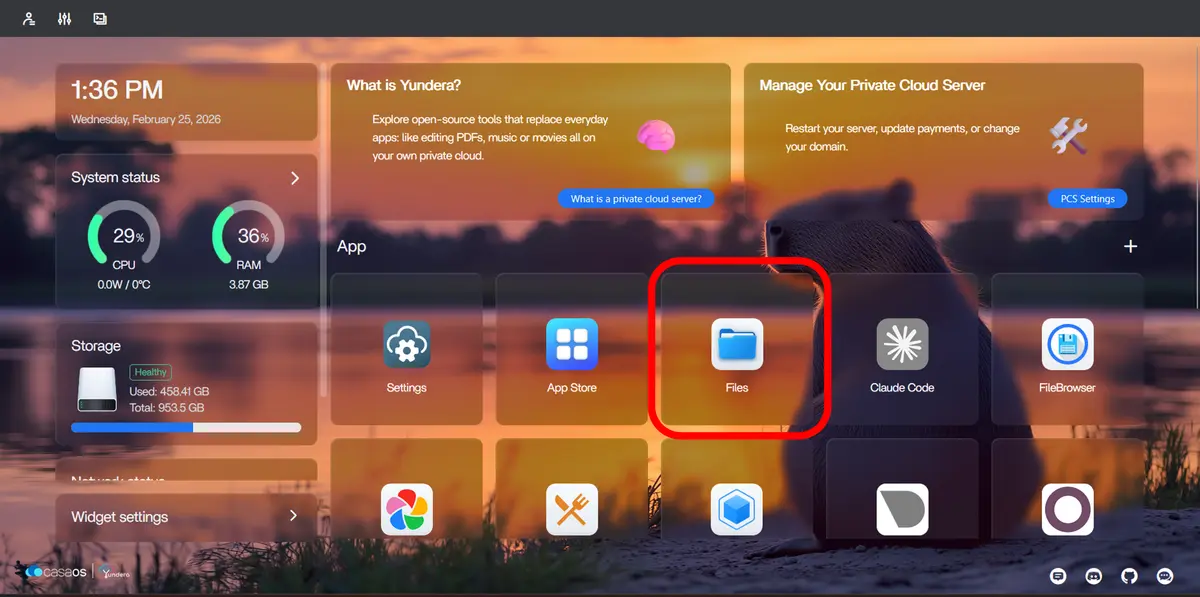
Open the Files app from your PCS dashboard:
Navigate to the Gallery folder, then upload your files using the Upload button or drag-and-drop:
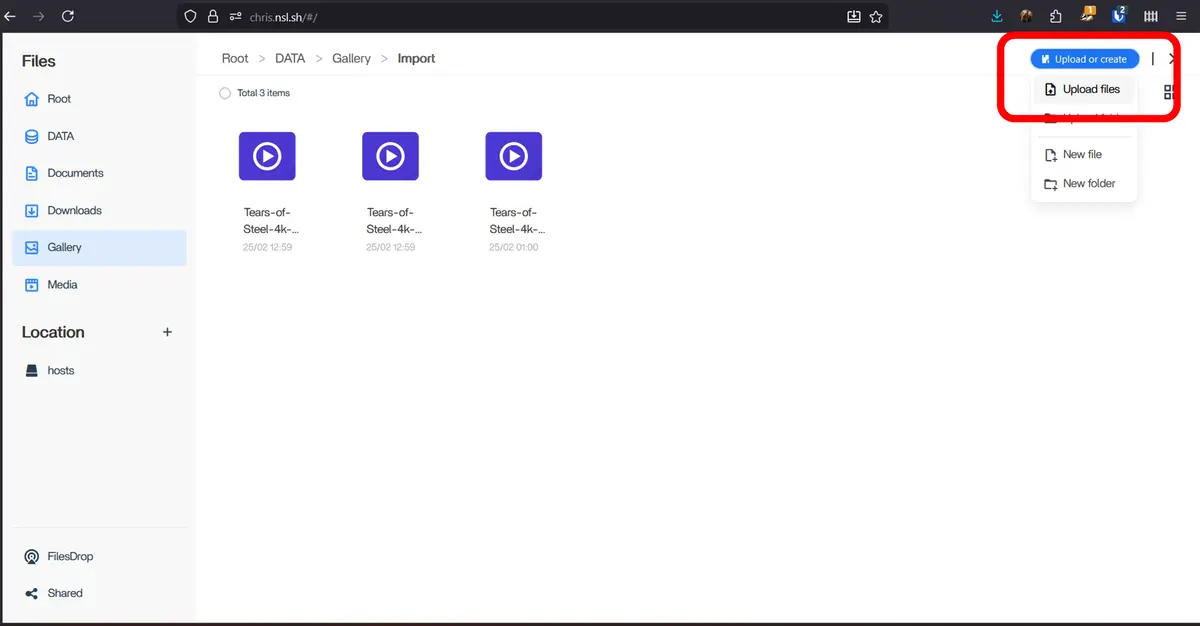
💡 Don't worry about duplicates. Immich detects and handles duplicate files automatically — it will skip anything that's already in your library.
Step 2 — Create an API key in Immich
You'll need an API key so the Terminal can authenticate with Immich.
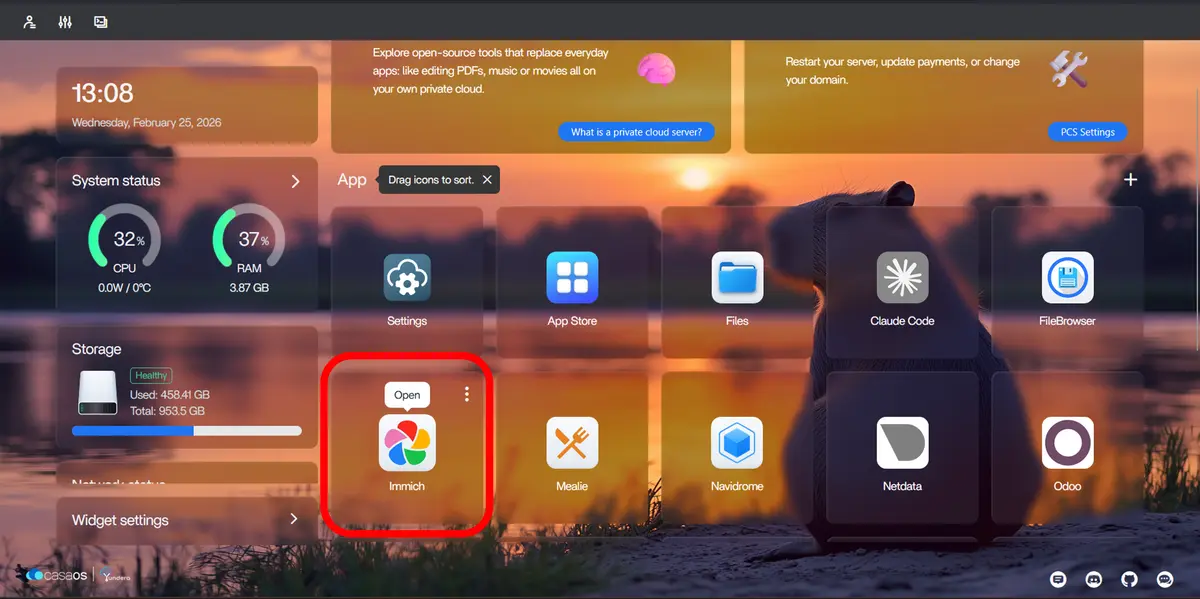
a) Open Immich from your PCS dashboard:
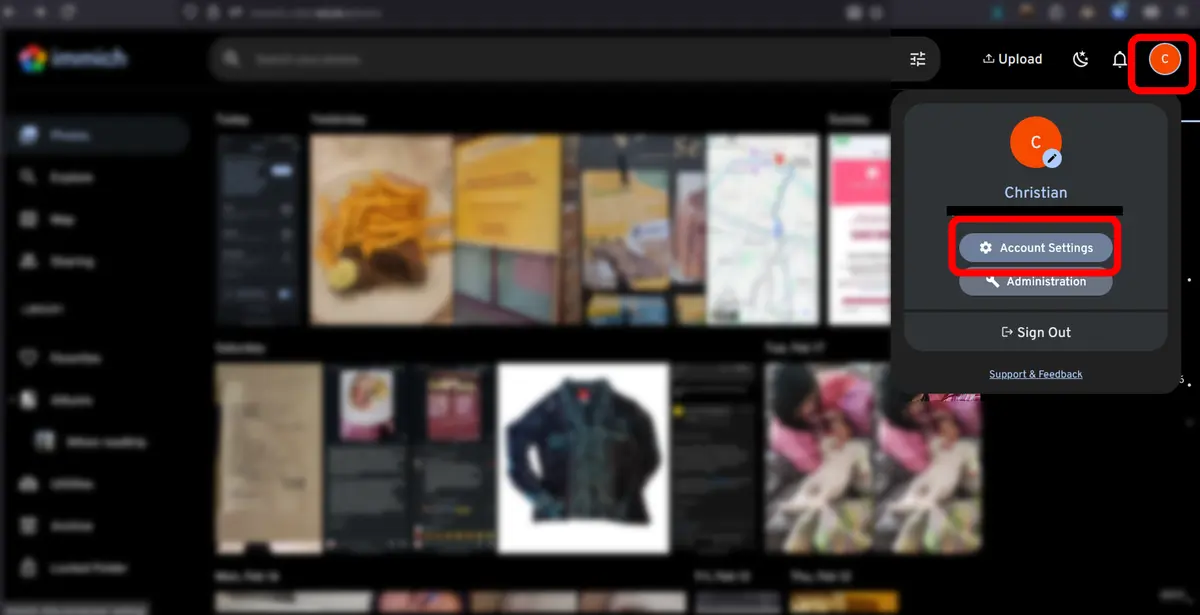
b) Click your profile icon (top-right corner) → Account Settings:
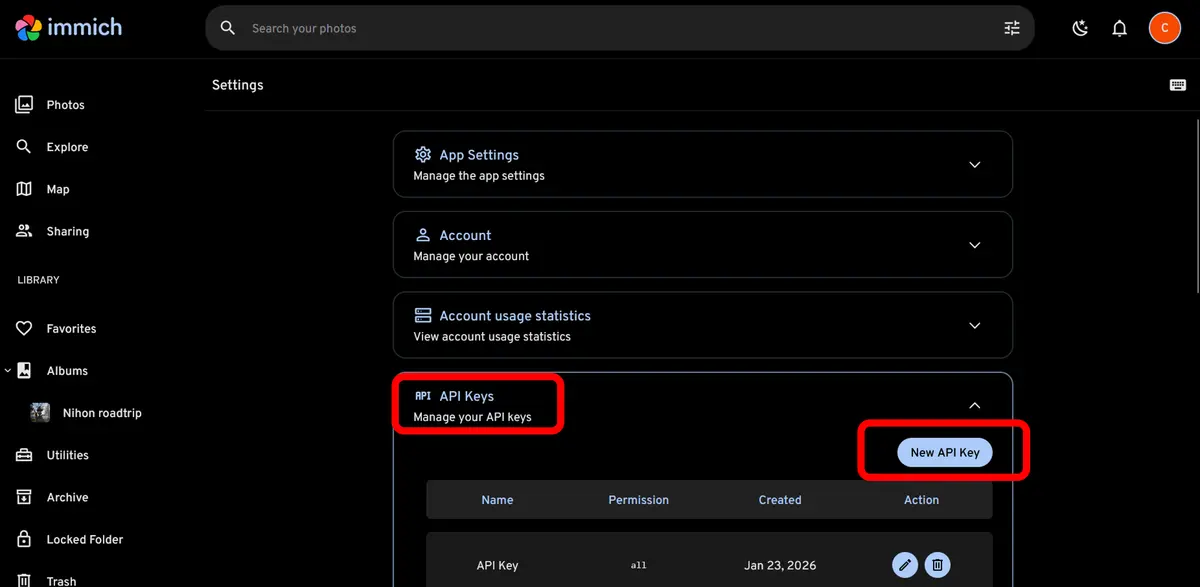
c) Go to API Keys → click New API Key → grant all permissions → click Create:
d) Copy and save your API key somewhere safe. It grants full access to your Immich account and won't be shown again.
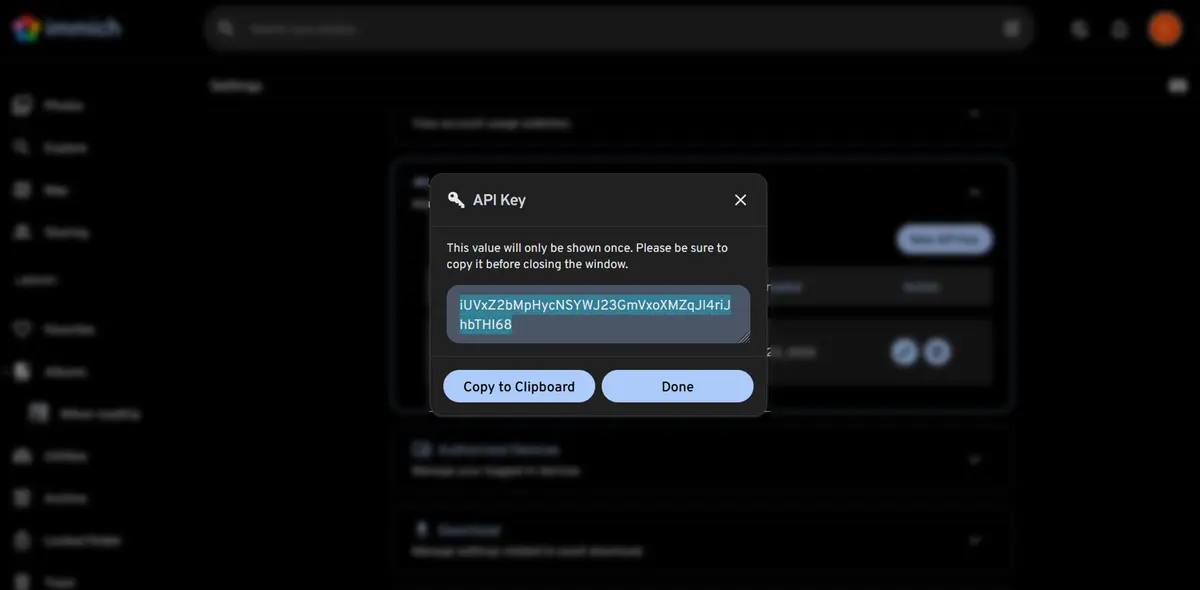
⚠️ Keep this key private! Anyone with this key has full access to your Immich library. Store it securely and never share it publicly.
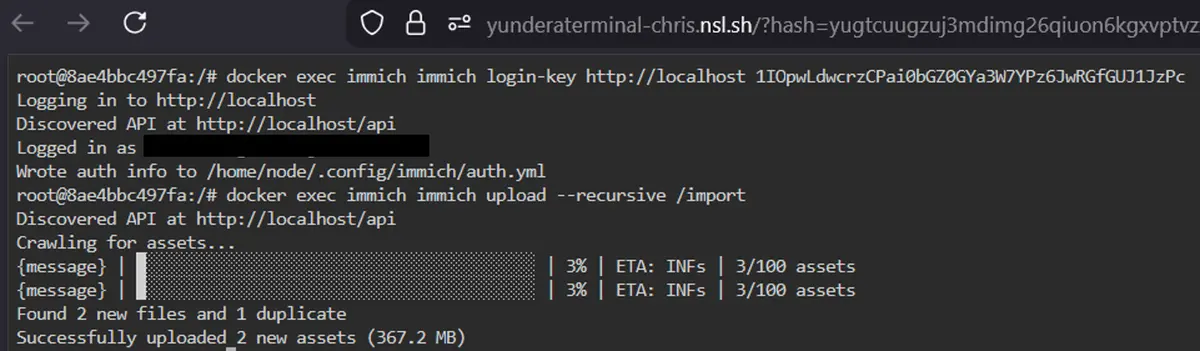
Step 3 — Import the files via Terminal
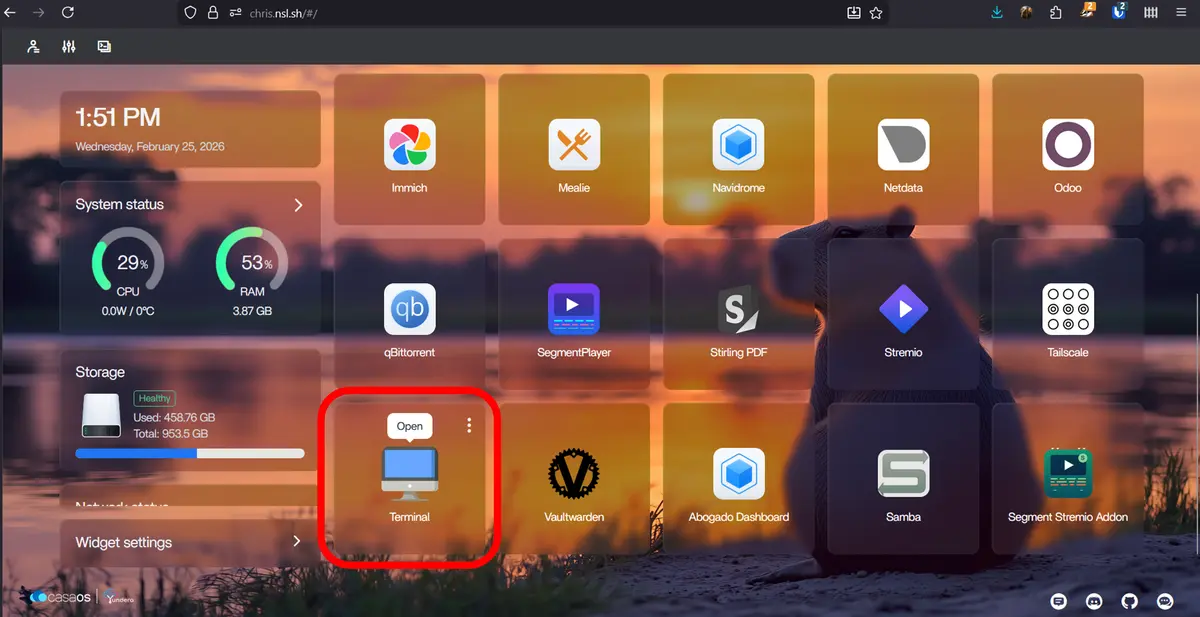
a) Open the Terminal app from your PCS dashboard:
b) Log in to the Immich CLI with your API key:
docker exec immich immich login-key http://localhost YOUR_API_KEY
Replace YOUR_API_KEY with the key you saved in Step 2.
c) Upload all files from Gallery into Immich:
docker exec immich immich upload --recursive /import
The terminal will show how many new files were found and uploaded:
✅ That's it! The files that previously failed are now imported into Immich.
🎉 Result
The files that previously failed to upload are now available in Immich. In our example, all three versions of the video now appear correctly — before (2 upload errors, only 1 video) vs. after (all 3 videos displayed):
[📸 Insert here: Results import large files in immich with your PCS.png]
🔧 Technical Details (For Advanced Users)
This section is optional — only read if you're curious about what's happening under the hood.
Why does this workaround work?
The Immich web/mobile upload has a file size limit around 100 MB due to HTTP request constraints. The CLI tool (immich upload) bypasses this by running inside the Docker container on your PCS, transferring files locally instead of over the network.
What does the upload command actually do?
docker exec immich immich upload --recursive /import
- docker exec immich — runs a command inside the Immich Docker container
- immich upload --recursive /import — tells the Immich CLI to scan the /import directory and upload everything it finds
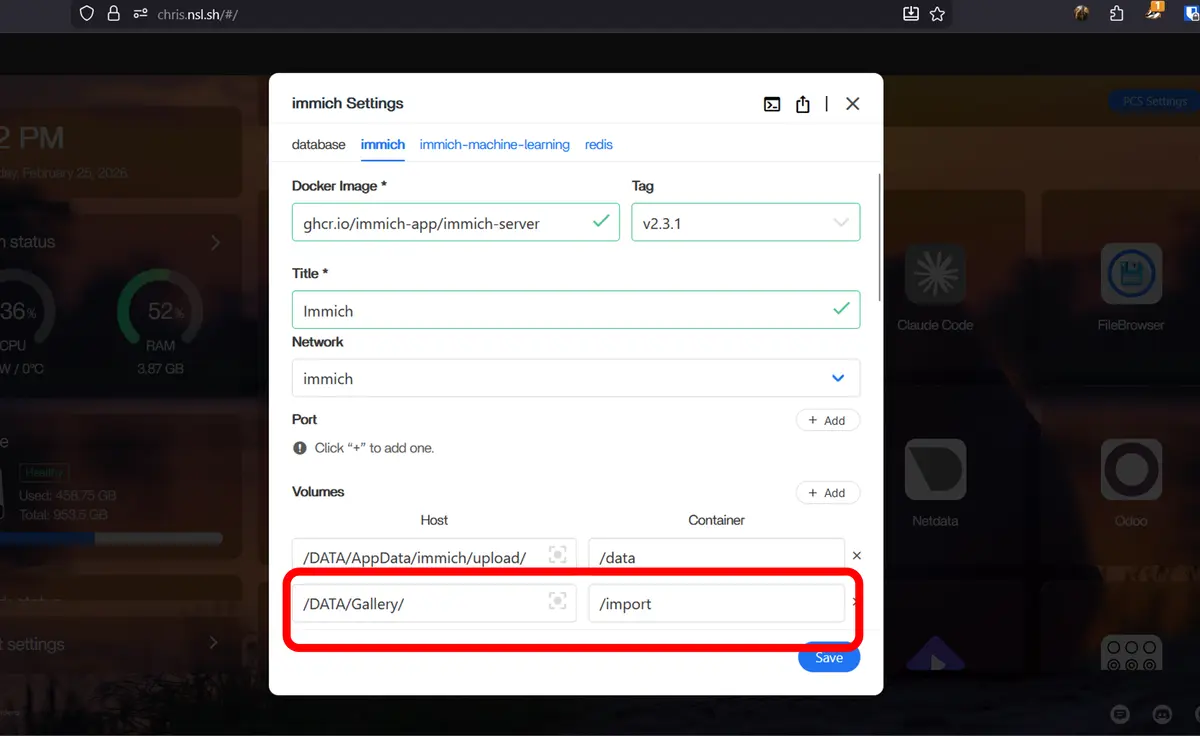
The /import path inside the container is mapped to your PCS Gallery folder. You can verify this in your Immich configuration:
Useful flags:
| Flag | What it does |
|---|---|
| --recursive | Scans all subfolders inside /import |
| --dry-run | Shows what would be uploaded without actually doing it |
What about duplicates?
Immich checks file hashes before importing. If a file already exists in your library (e.g., the 480p version that uploaded normally), it will be skipped — you'll see it counted as a "duplicate" in the terminal output.
Uploading Large Videos to Immich