How to Install Plex on Yundera : And Why It’s the Modern Way to Stream Your Own Movies
"Why pay monthly to stream some movies you already own?"
That was the question I asked myself one night, staring at a folder of 300 GB of movies I had carefully ripped over the years, sitting idle on a dusty external drive.
Enter Plex or Jellyfin: your very own personal Netflix.
And now with Yundera, installing Plex isn’t just easy, it’s almost criminally simple. No terminal. No config files. Just a few clicks, and boom: your movie library is alive again.
Let me walk you through it. But first we need to know the difference between the two movie hub apps: Jellyfin and Plex.
- Plex is a company-run app with a sleek, polished interface and features like trailers and recommendations : but many of those require a paid subscription. Watching your local movies requires a paid subscription. It’s easy to use, but your data is tied to their platform.
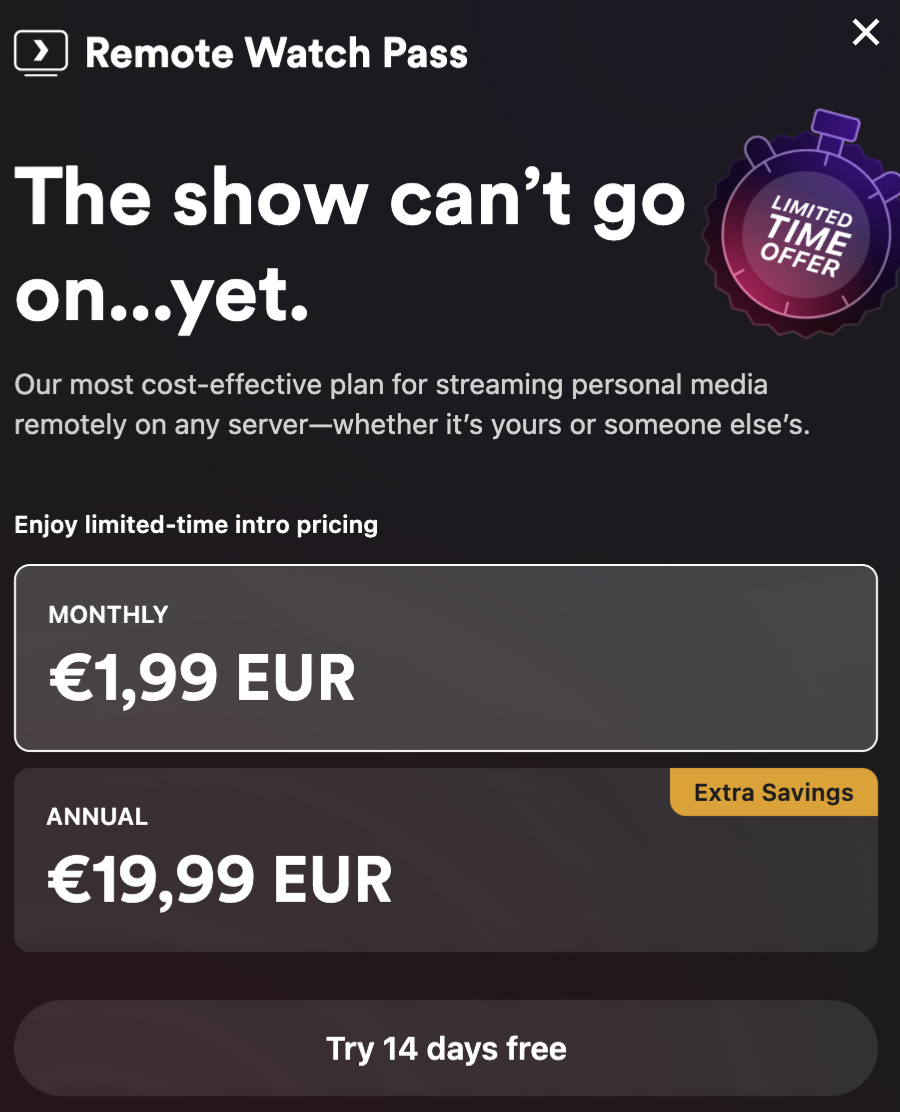
⚠️ To stream your own videos, Plex now charges a fee.
- Jellyfin, on the other hand, is fully open-source and always free. The interface is simpler, but it does the job without tracking or limits. A great choice for privacy and long-term freedom. Find the tutorial for Jellyfin here.
What is Plex?
Plex is a paid media server app that lets you stream your own collection of movies, music, and photos, on any device, anywhere. Think of it as:
- Netflix, but with your own content
- A media center with trailers, metadata, subtitles
- Supports remote access, even outside your home
- Can be used on smart TVs, phones, web browsers, and even gaming consoles
If Jellyfin is the privacy-first, open-source alternative : Plex is the polished, plug-and-play version. But it's paid. You choose what fits.
Step-by-Step: How to Install Plex on Yundera
Step 1: Open Your Yundera Dashboard
Head over to your server’s PCS dashboard. This is your control panel for all apps.

Step 2: Go to the App Store
Click App Store, You’ll see apps like Jellyfin, Nextcloud, Syncthing... and yes, Plex.
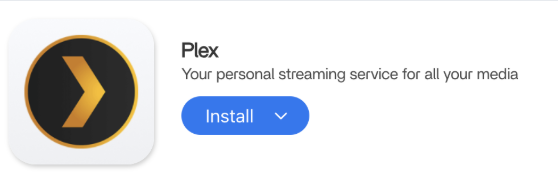
Step 3: Search and Install Plex
In the search bar, type "Plex" and click Install. Yundera will automatically set it up as a Docker container.
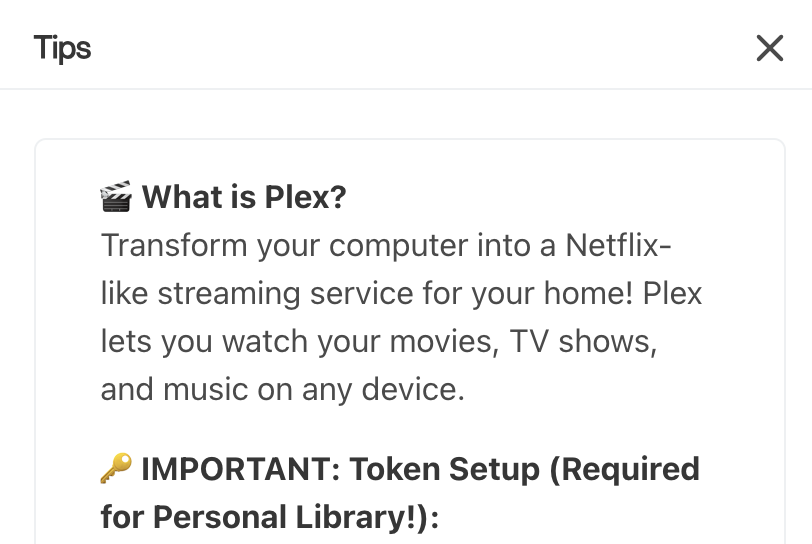
Read carefully the tips!
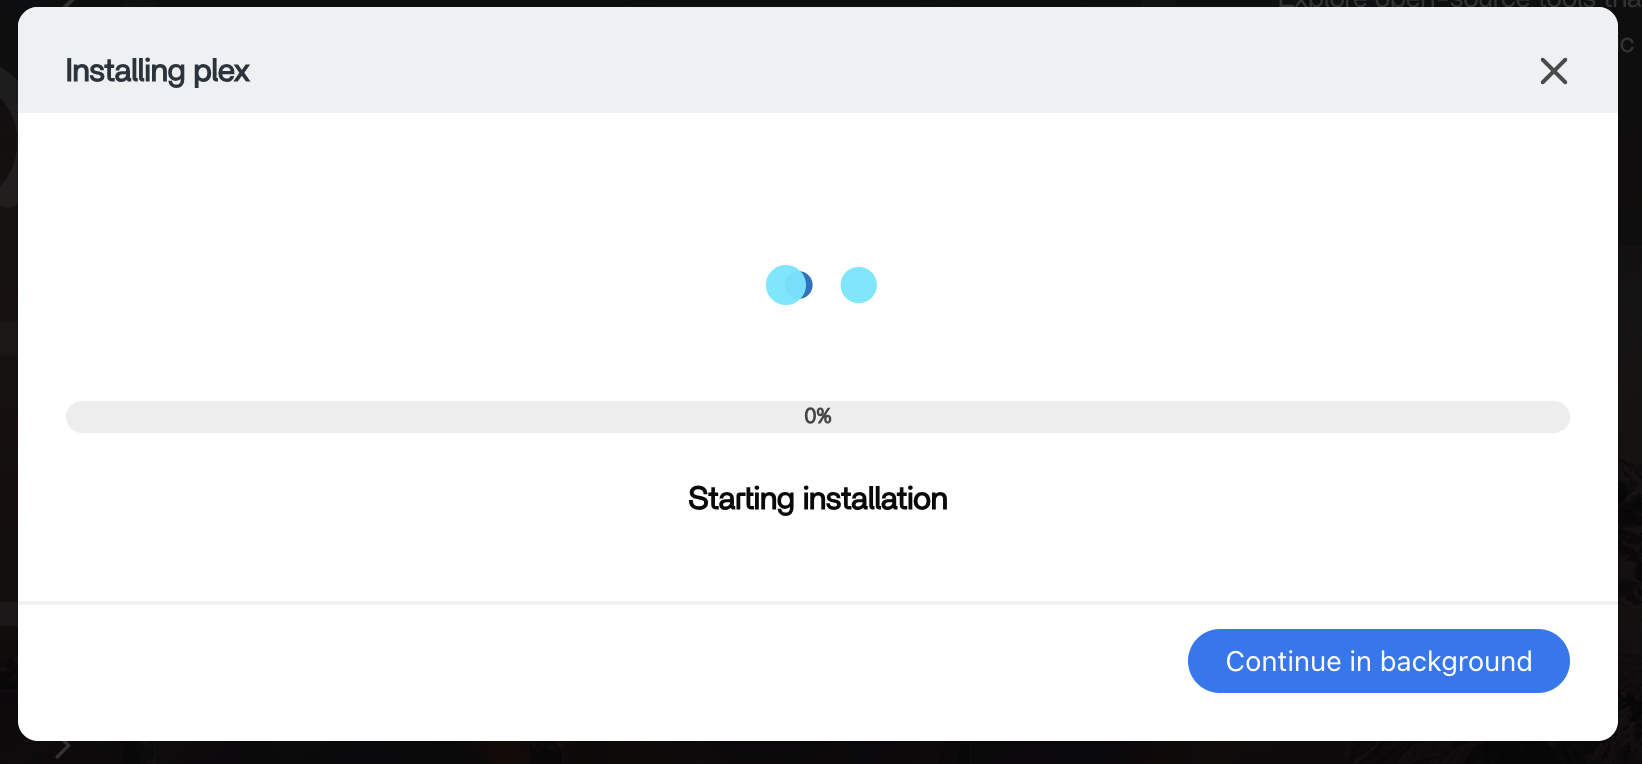
Plex is now installing : please give it a few minutes.
Once it finishes, wait a little before launching the app. Opening it too quickly might cause errors while the system finalizes setup.
Step 4: Set Up Your Plex Account
Once installed, click Open App. You’ll be redirected to Plex’s setup page. Sign in (or create) your Plex account.
🔐 Note: The first Plex account that logs in becomes the admin of that server.
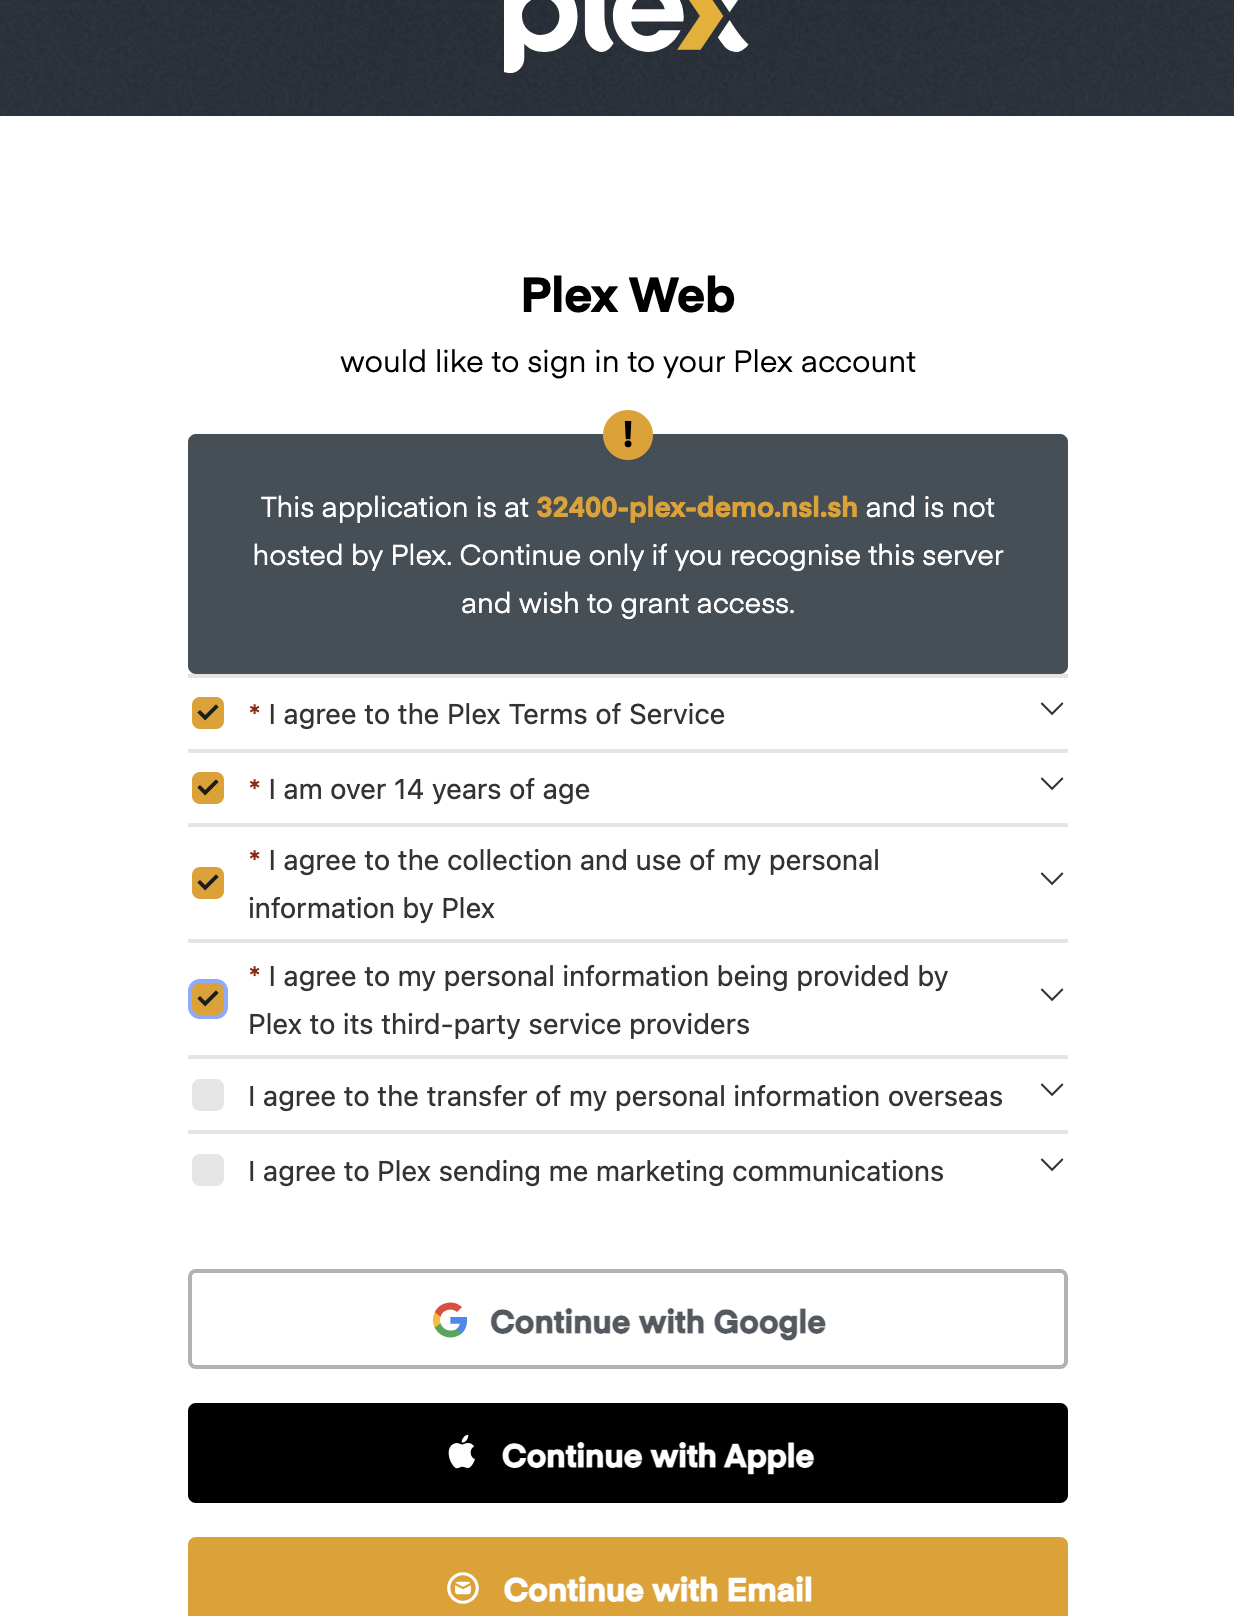
Here, you’ll need to sign up or log in to your Plex account.
Please note: Yundera is not affiliated with Plex, and we have no control over their third-party services or data policies.
If you prefer a fully private, open-source media solution with no external accounts or tracking, we recommend trying Jellyfin instead.
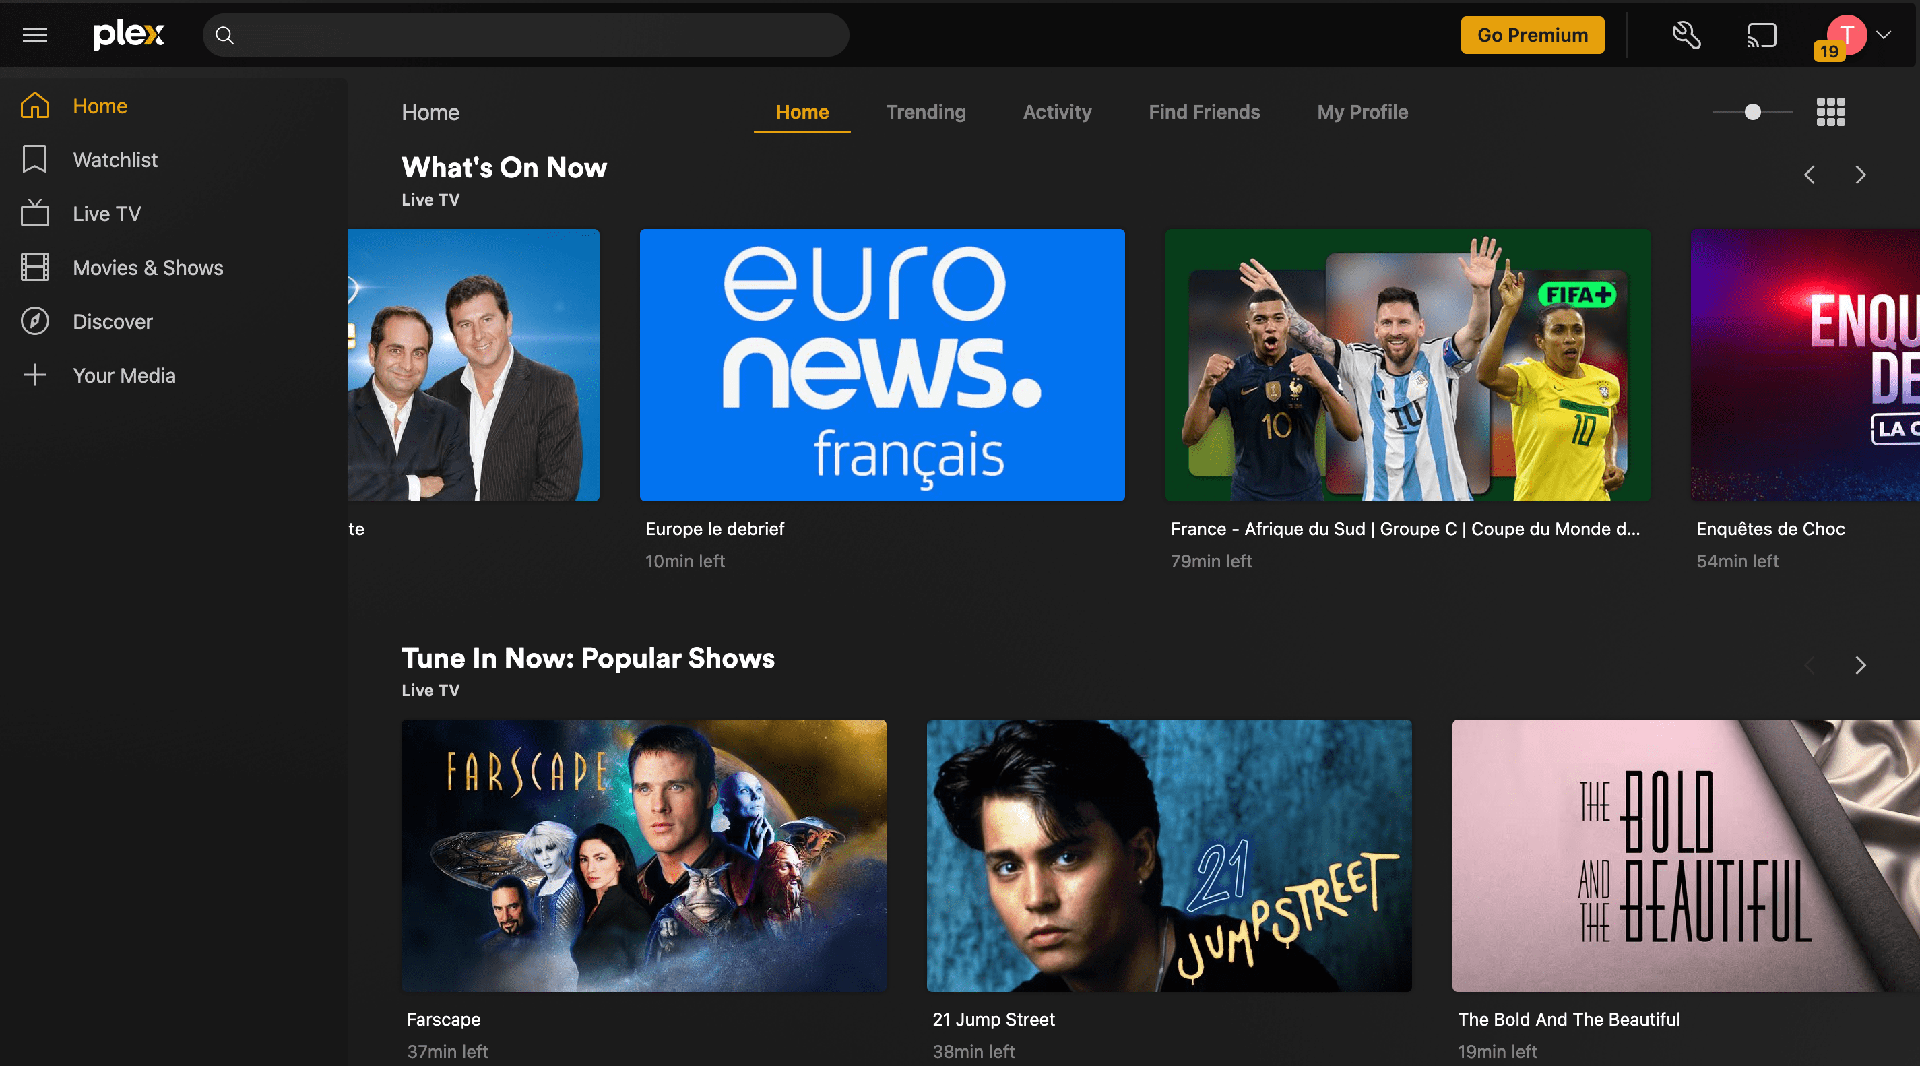
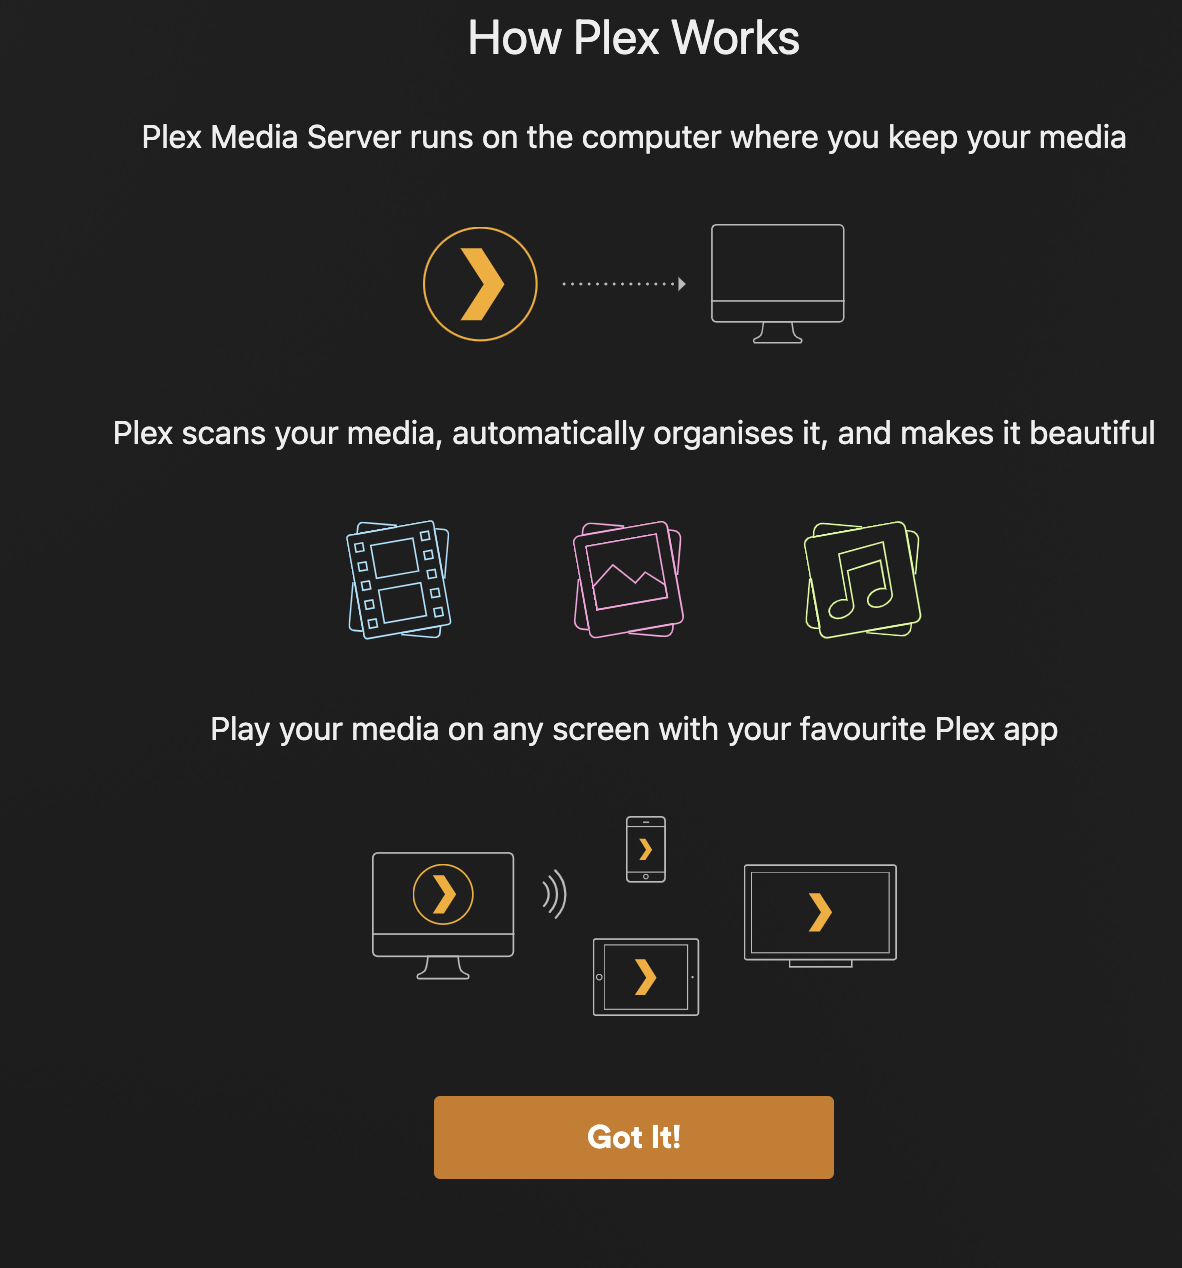
Welcome to Plex!
You now have access to Plex’s public content and live TV features.
Next, let’s set up your personal media library so you can stream your own files through Plex.
⚠️ Warning: Setting up Plex with your personal media library is a bit more complex now.
Here are two important things to know:
- Some features (watching local media) require a paid subscription
- The setup involves a few technical steps
If you prefer a fully free and simpler option, you might want to try Jellyfin instead.
Step 1 to link Plex to your media library : Link your unique Plex ID to your Plex Server.
First you will have to log in and go to : https://plex.tv/claim
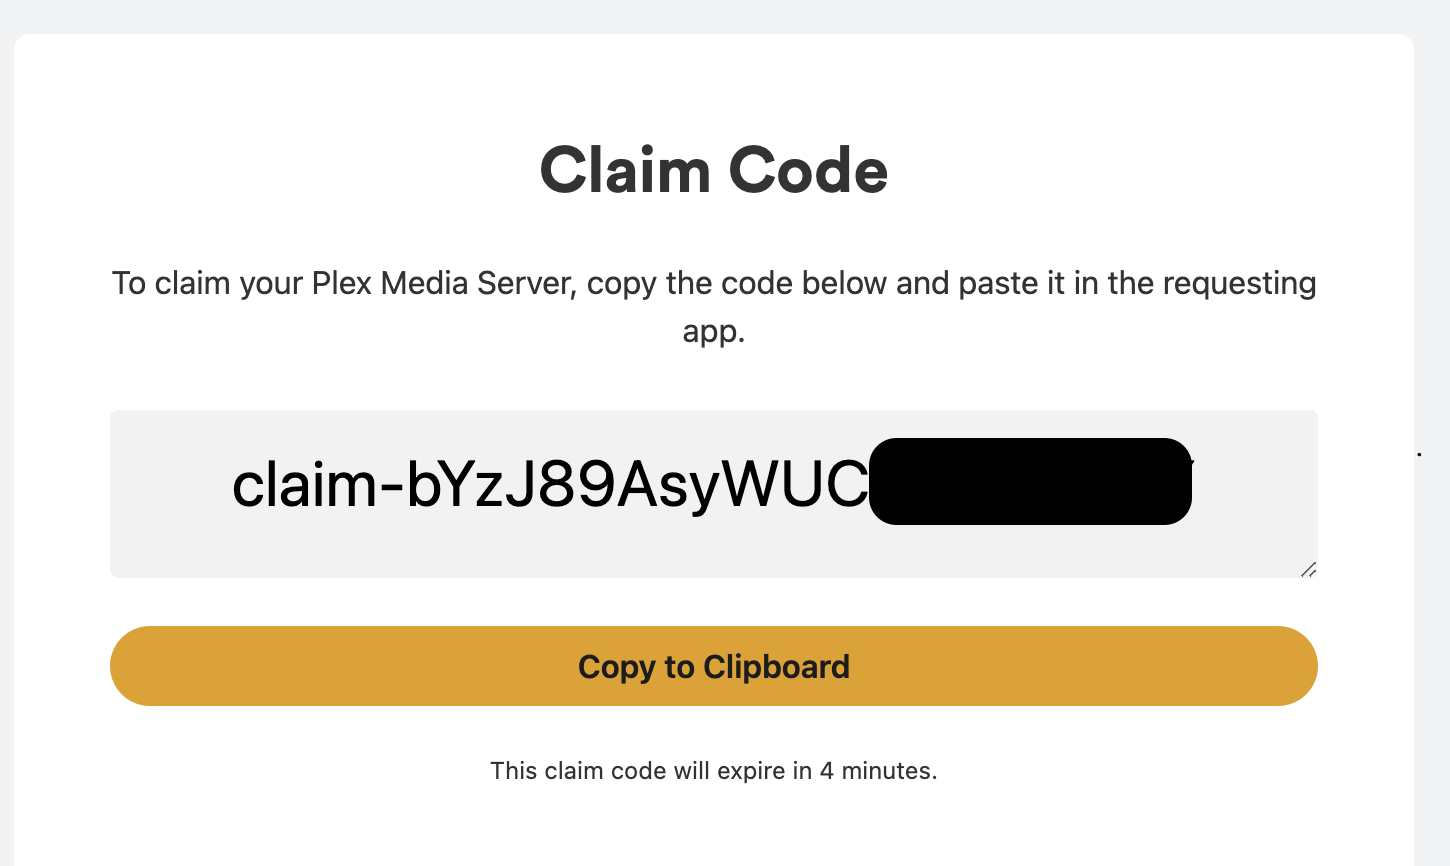
Copy the provided code.
Then you need to go back to your main PCS dashbord, click on the three dots .
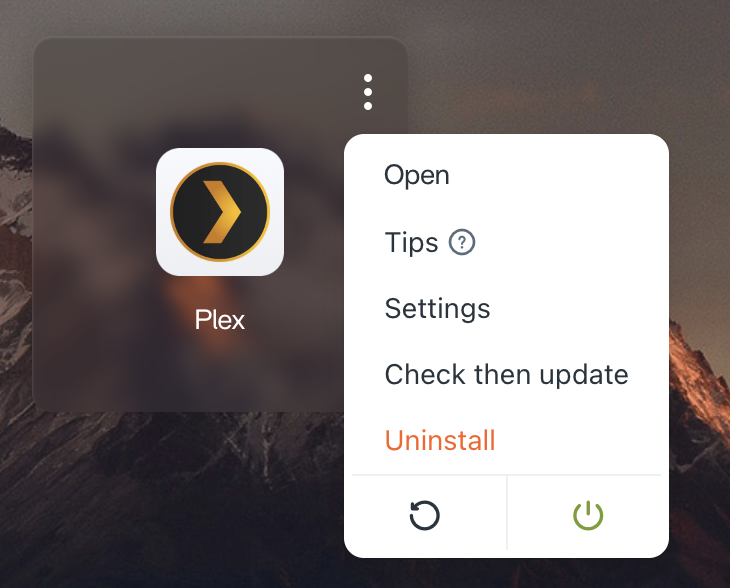
Click on Settings
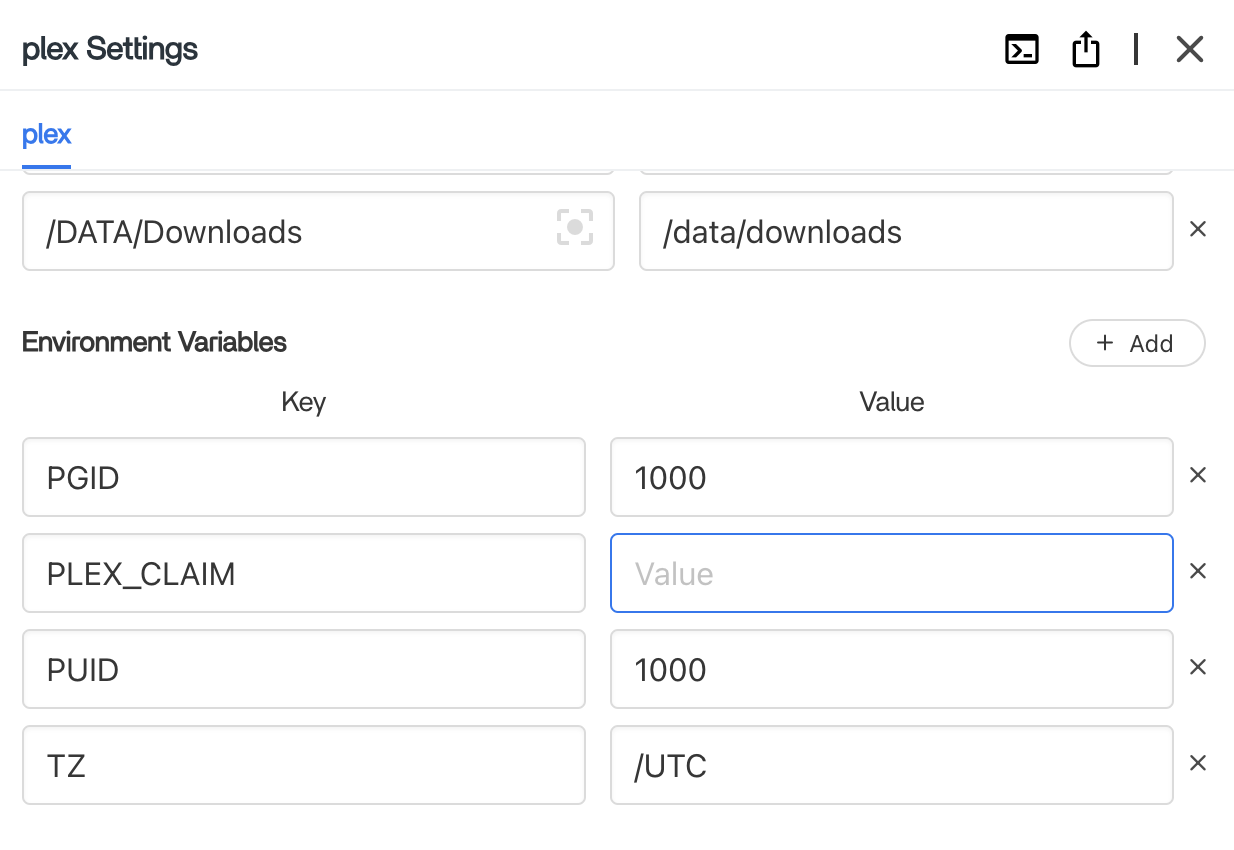
Scroll down, go to "PLEX_CLAIM". Paste the Code.
Click Save.
Now, you can open Plex App again.
After waiting for 5-10 minutes, the connection should establish and you should see this pop up coming.
Click "Got It!" and Plex will ask you to pay. Remember, you do have to pay to watch your movies. Skipping here will still remind you to pay when launching your custom movies.
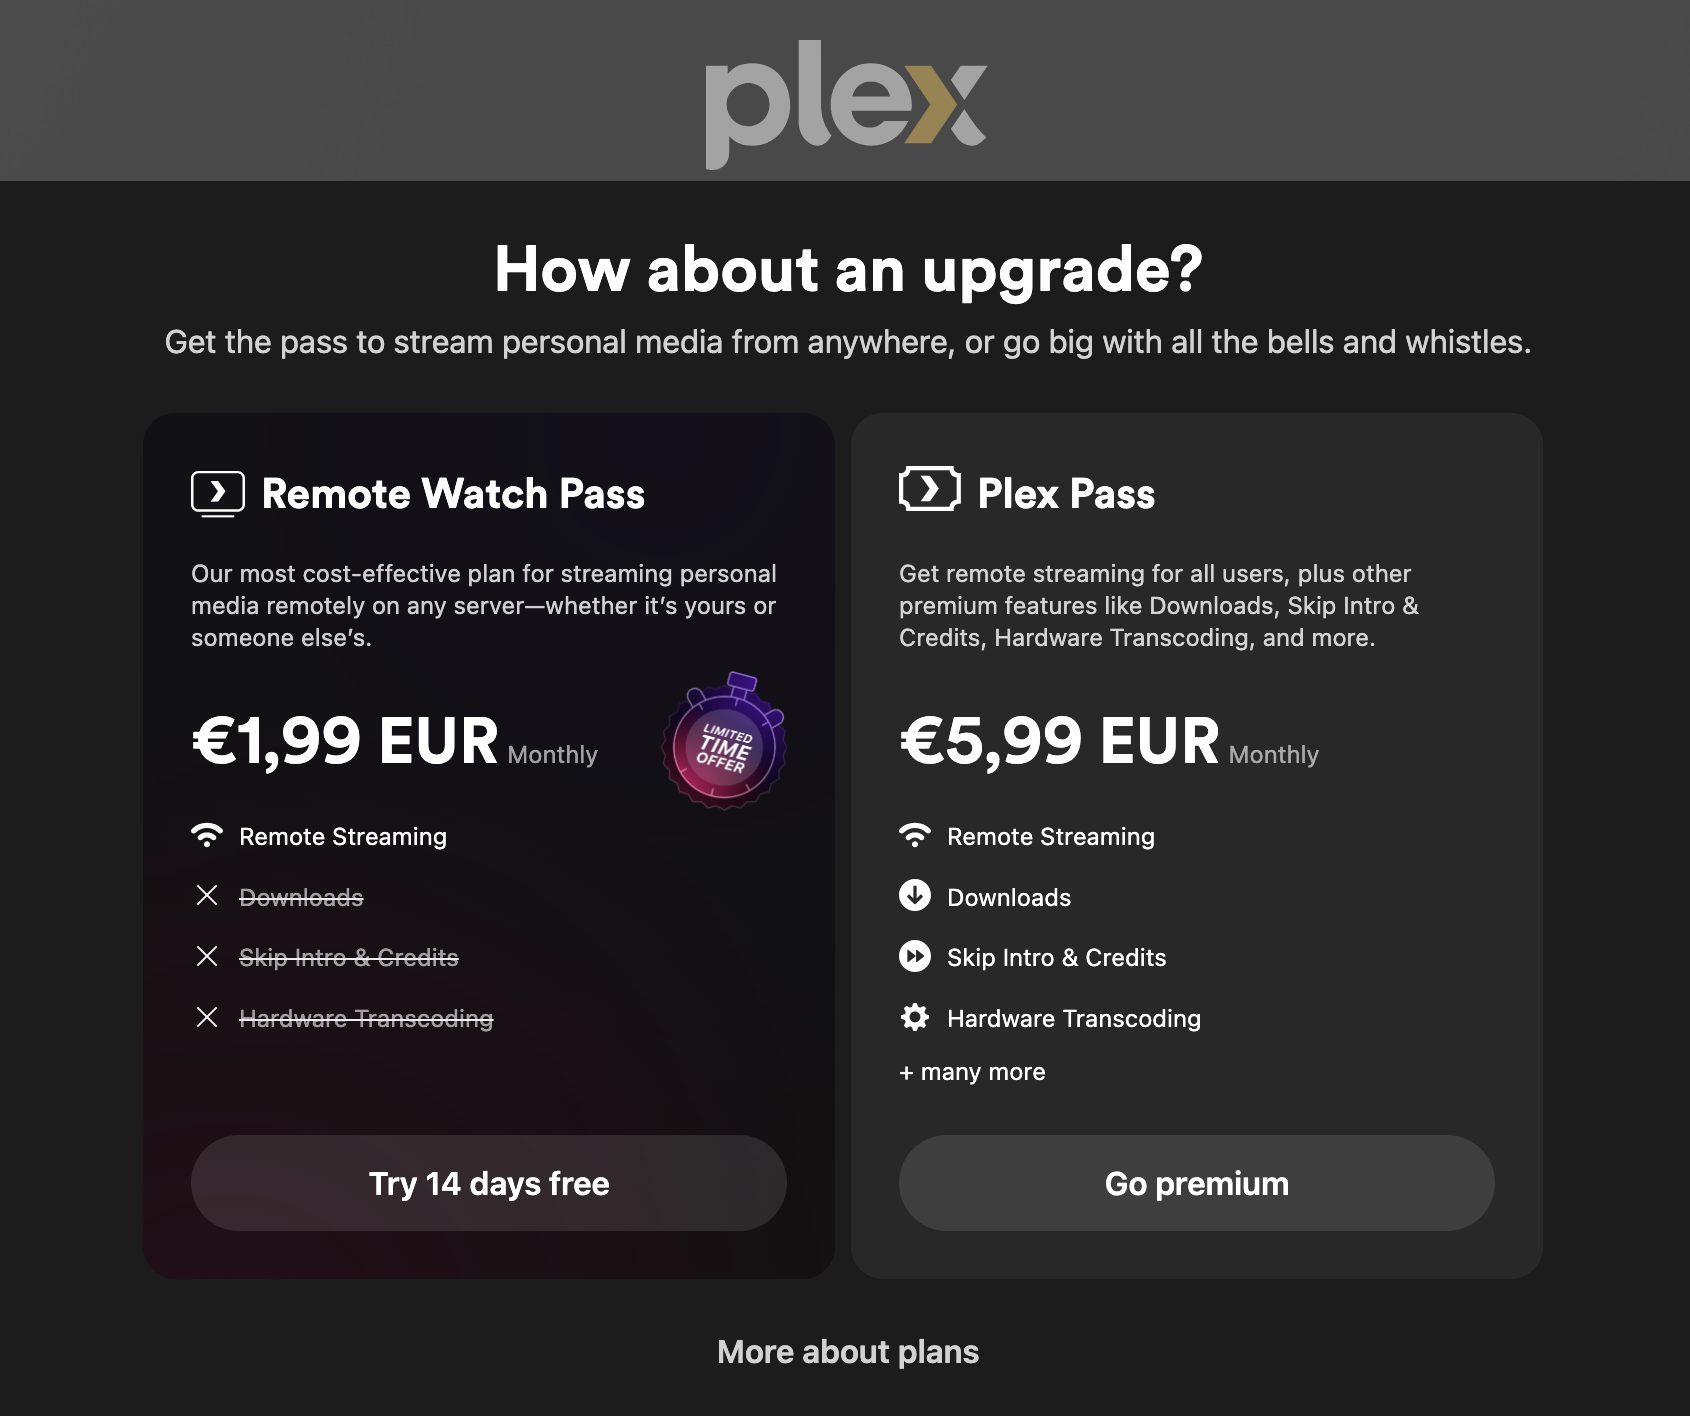
Pay now or later, but note :
ℹ️ Yundera is not affiliated with Plex and does not control their services.
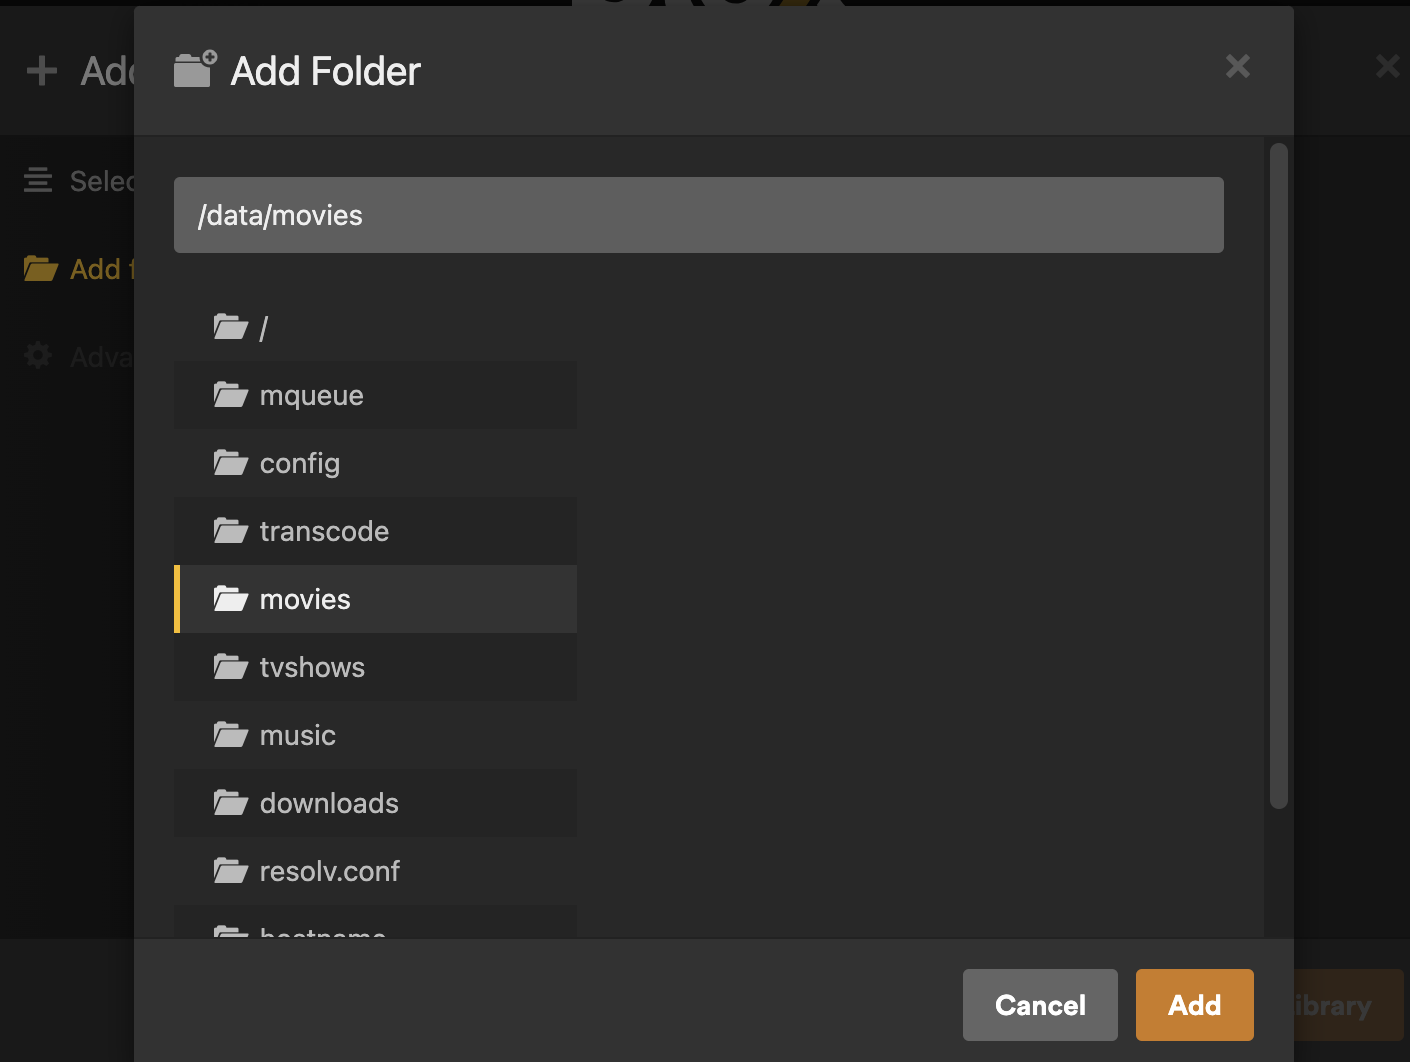
Now you can choose your Media Library. This is important. It will be where your movies / TV Shows loads from.
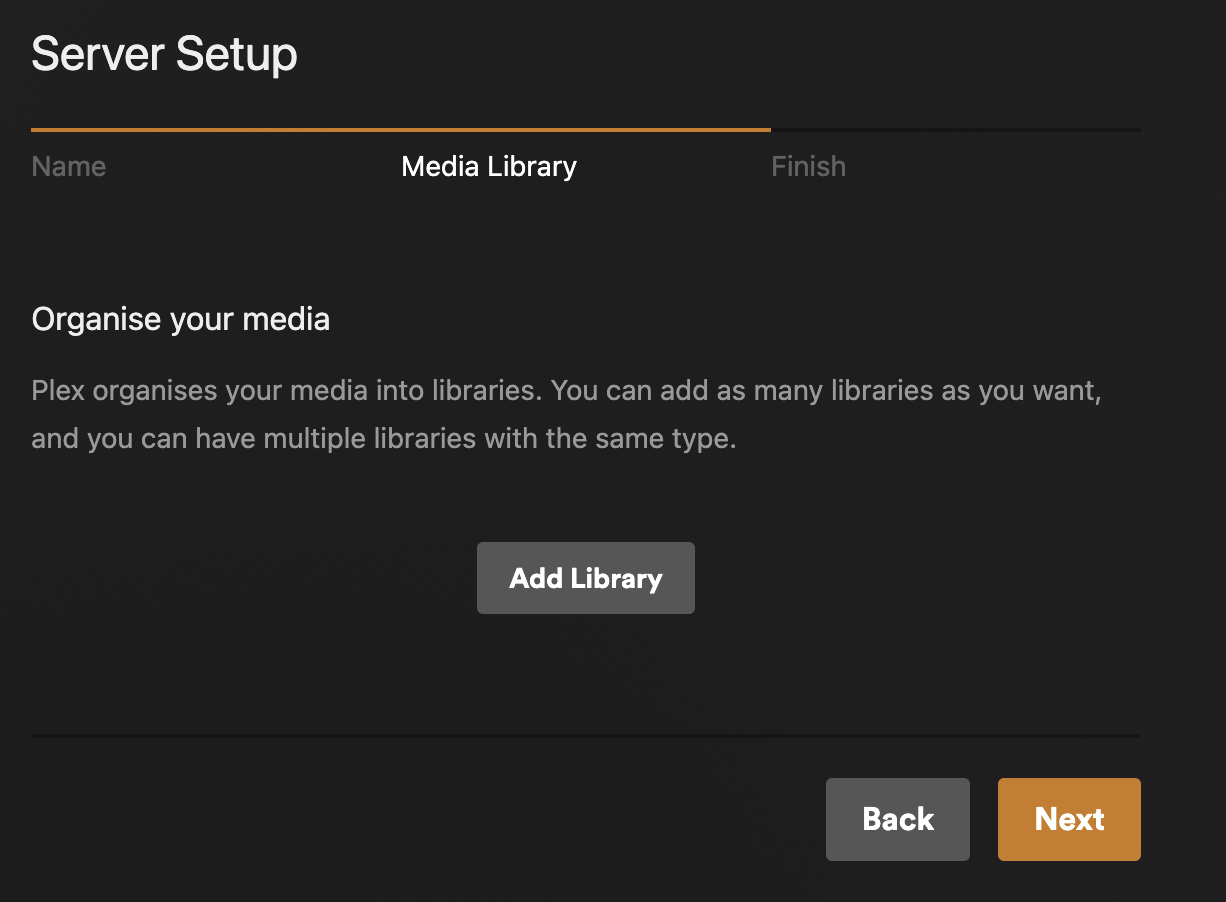
Click Add Library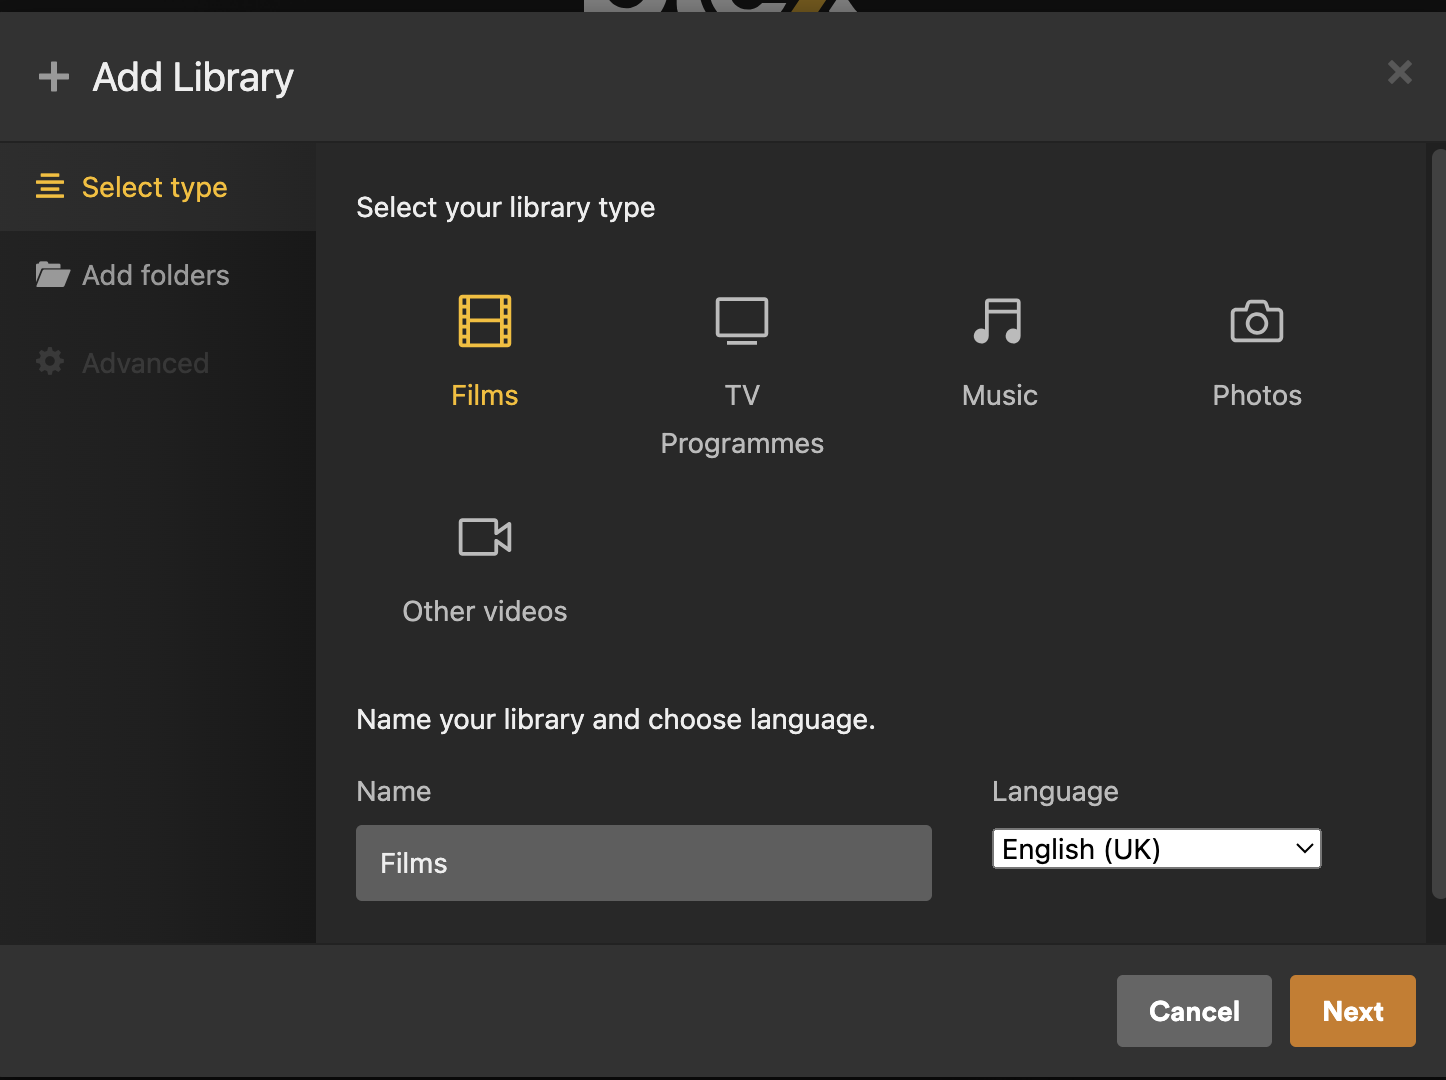
Choose Films or TV Programmes, and set up the path in the right folder. By default we recommend in /data/movies.
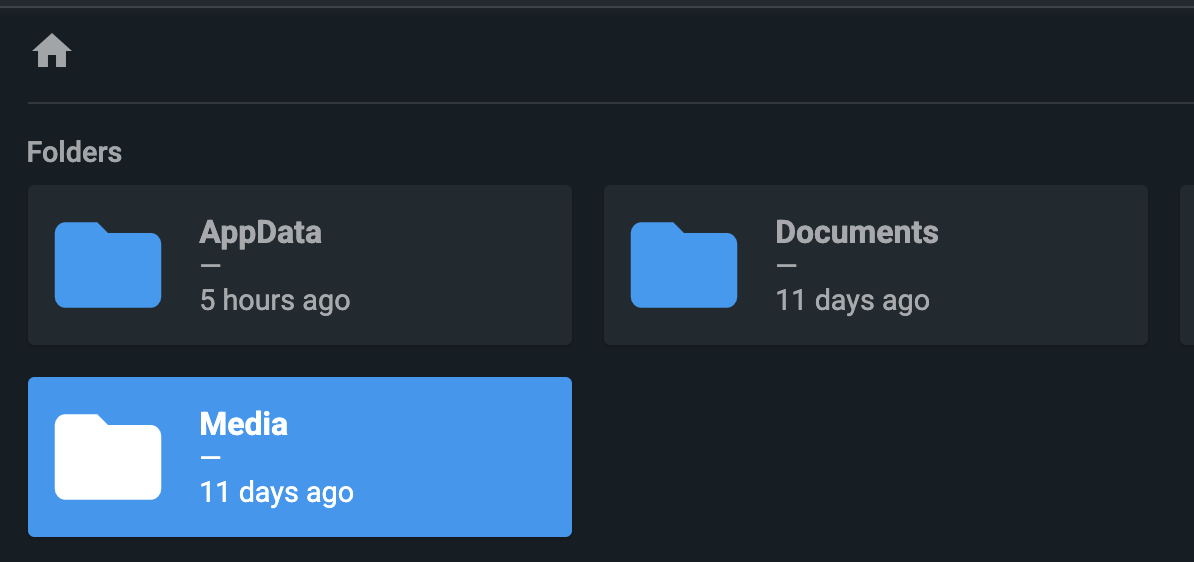
For information, in Filebroswer this is in the Home folder / Media.
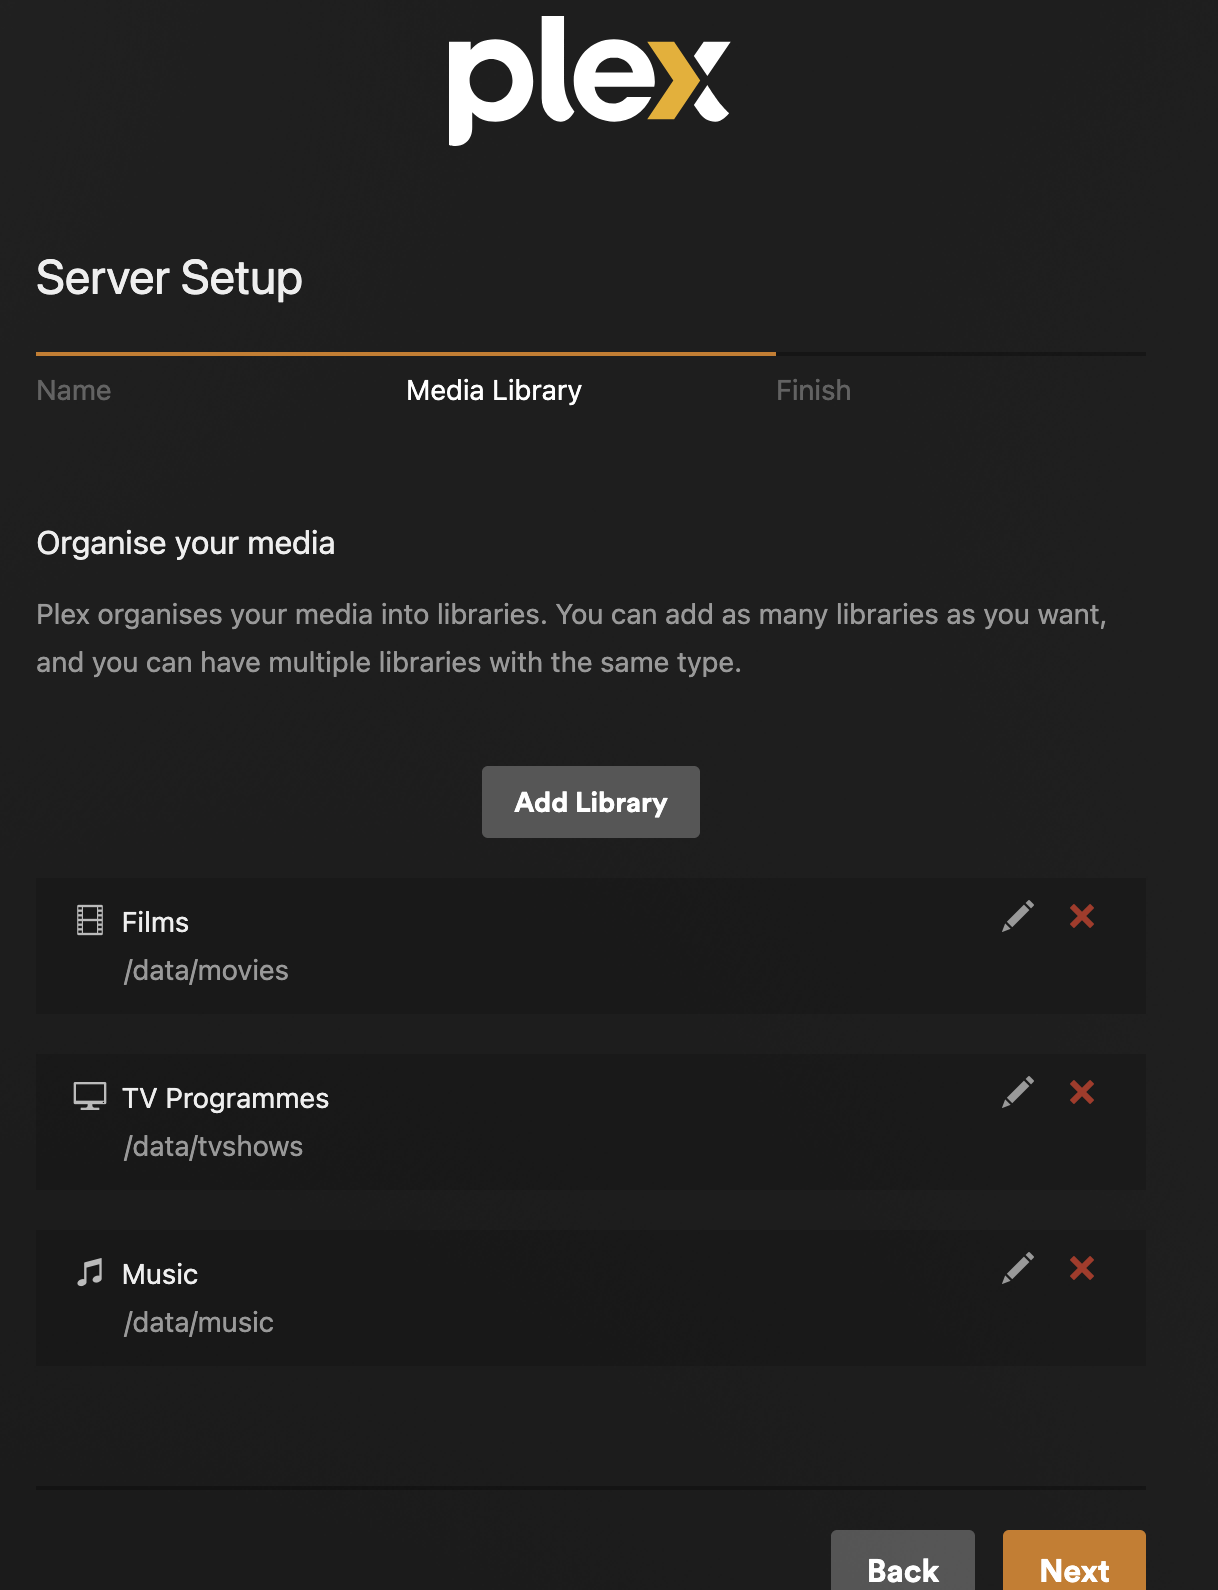
Once you have organized all of your 3 key folders, you can click Next.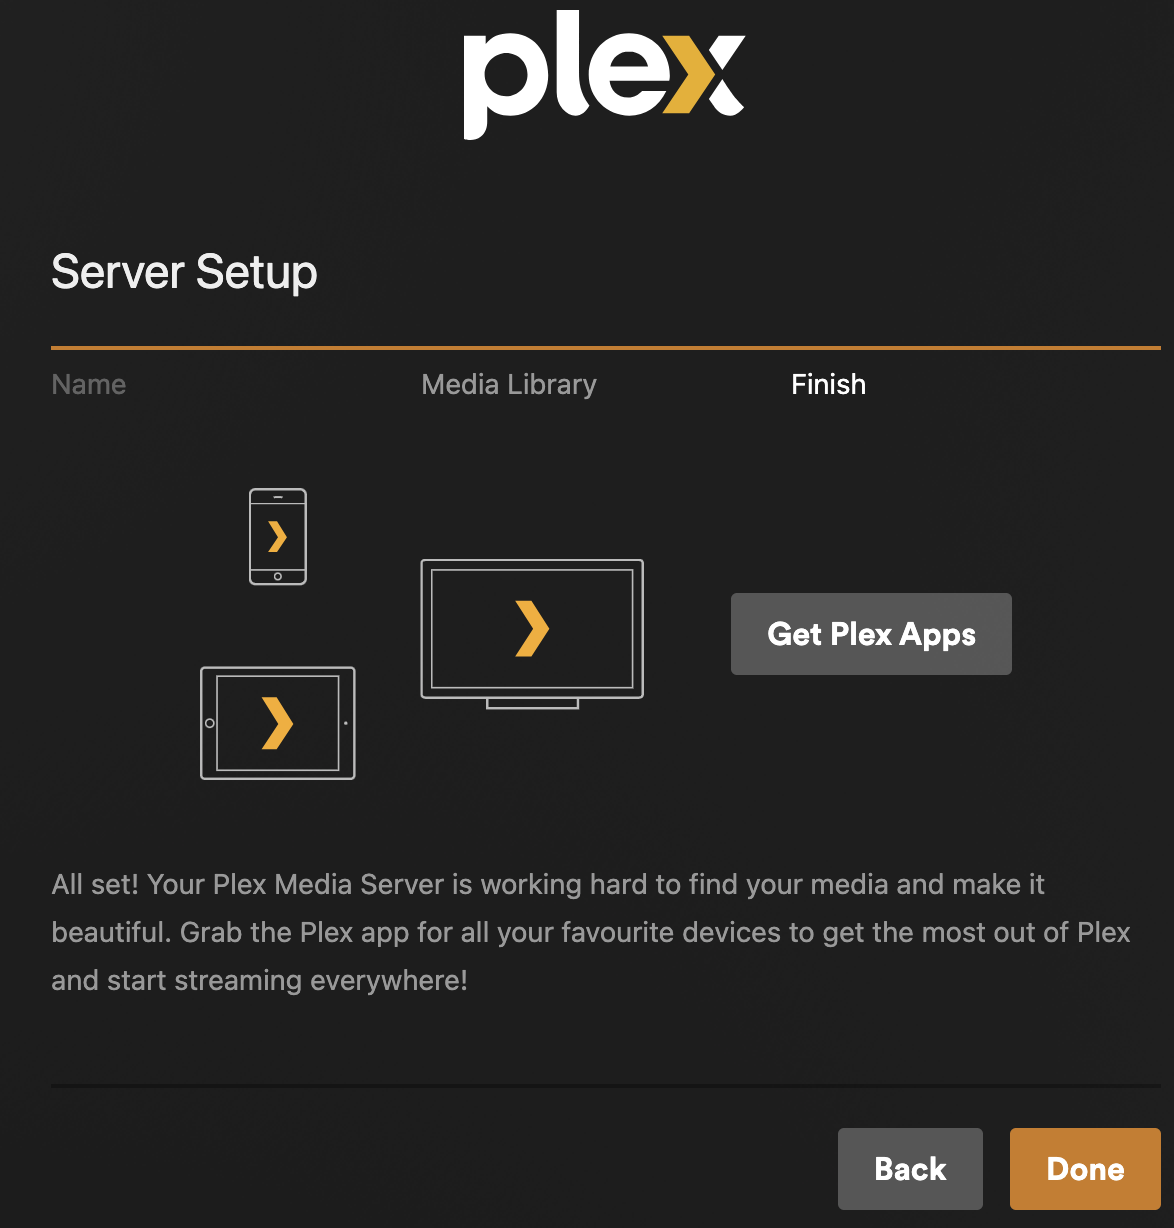
Click Done when finished. And if you did not pay, it will remind you to pay.
Here you are, you should have all your movies for your media files loaded into Plex!
Some last tips :
💡 For your file organization, we recommend you having these type of names :
• Movies: “Avatar (2009)/Avatar (2009).mp4”
• TV: “Breaking Bad/Season 01/S01E01.mp4”
• Music: “Artist/Album/Song.mp3”
- To share with family: Invite other Plex accounts from your server settings.
Why Plex + Yundera is the Ideal Match
Because hosting Plex on Yundera means:
- No third-party tracking of what you watch
- No monthly fees
- Full control of your content
- Easy to manage via CasaOS
In a world where everything is turning into a subscription, there’s something liberating about owning your media experience.
And with Yundera, you don’t need to be a sysadmin to get there.
So go ahead — stream smarter, not harder.
Your movies deserve it.
How to setup Plex?